Overview
Adding the Google Indexing API helps your jobs get indexed by Google much faster.
Instead of waiting weeks for jobs to appear in search results, the Indexing API can get them listed on Google Jobs within 24 hours — driving significantly more visitors to your site.
Instead of waiting weeks for jobs to appear in search results, the Indexing API can get them listed on Google Jobs within 24 hours — driving significantly more visitors to your site.
What you’ll need
- A Google Cloud account
- A Google Search Console property (your site must be verified)
- A few minutes of setup time
Step 1: Create a Google Cloud project
- Go to the Google Cloud Console.
- Accept the terms of service if prompted.\
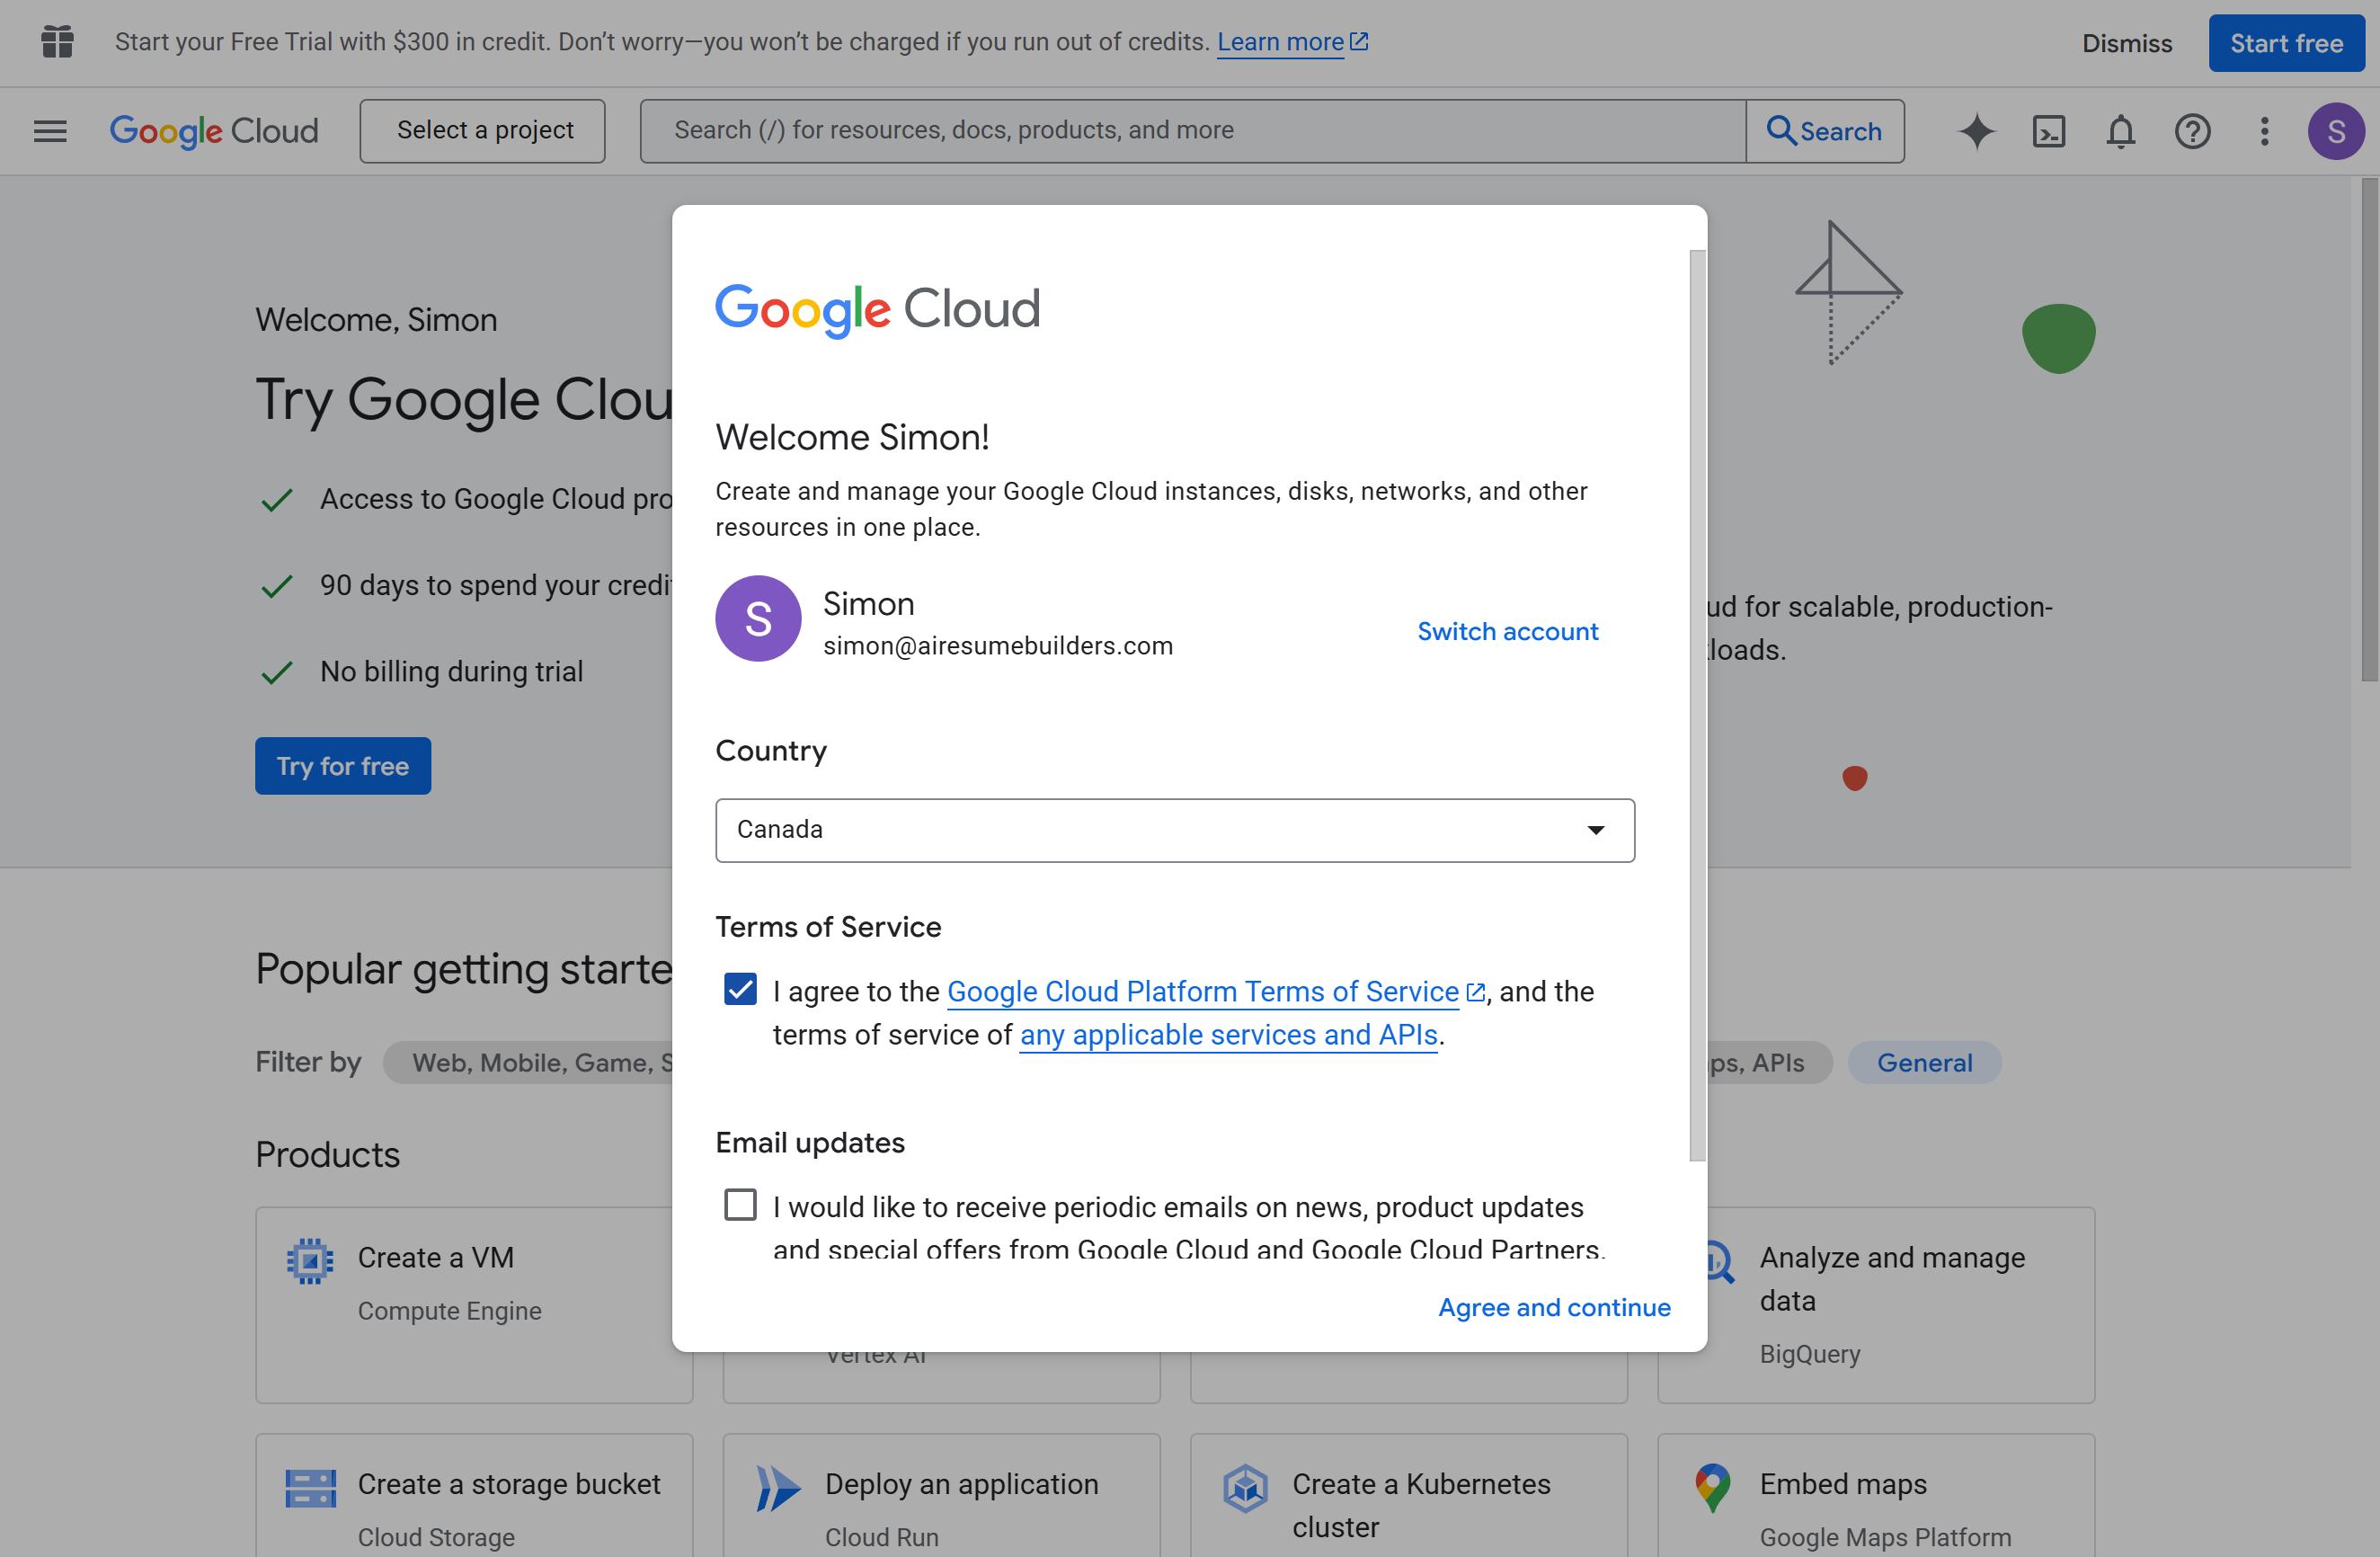
- Click Select a project → New Project.\
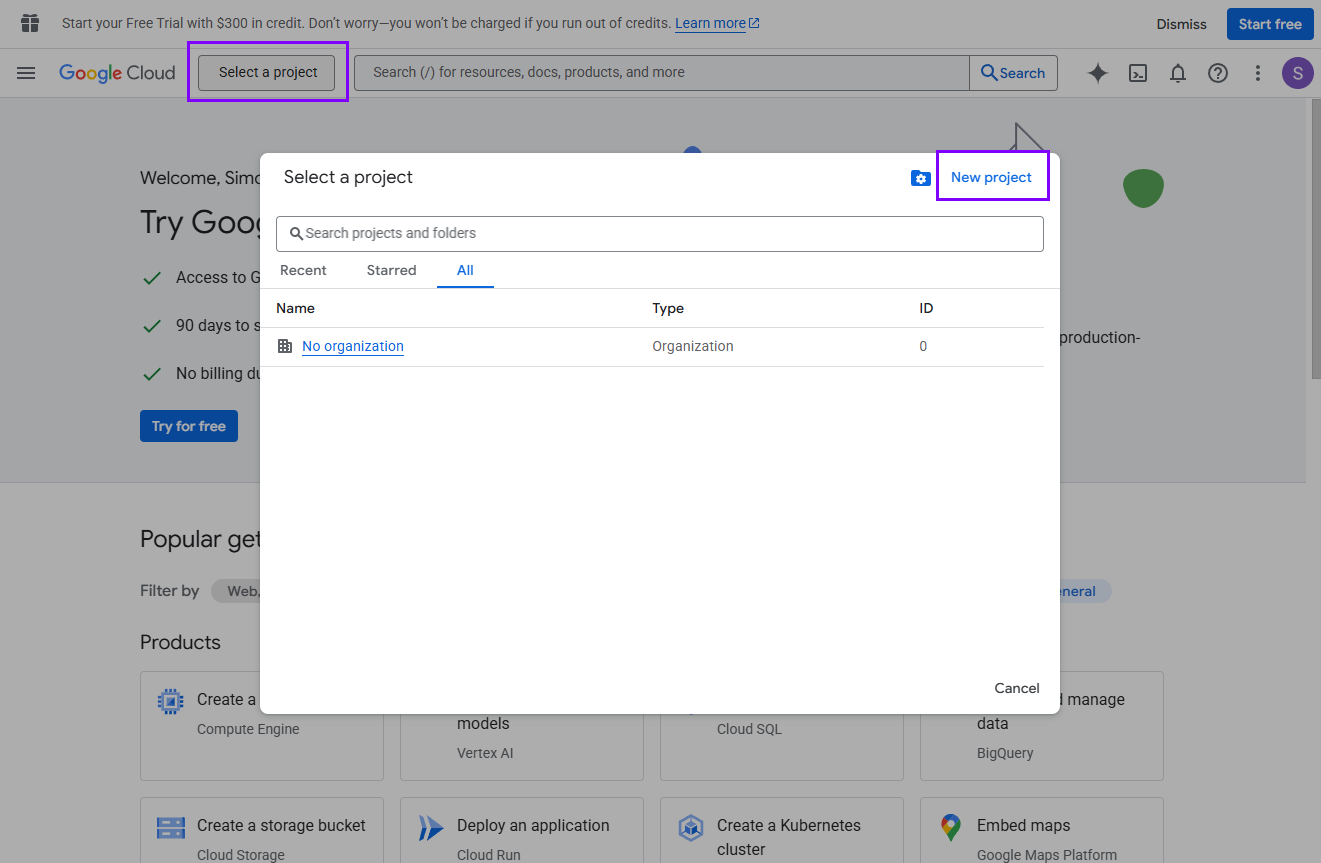
- Give it a name such as
Indexing API Kardow, then click Create.\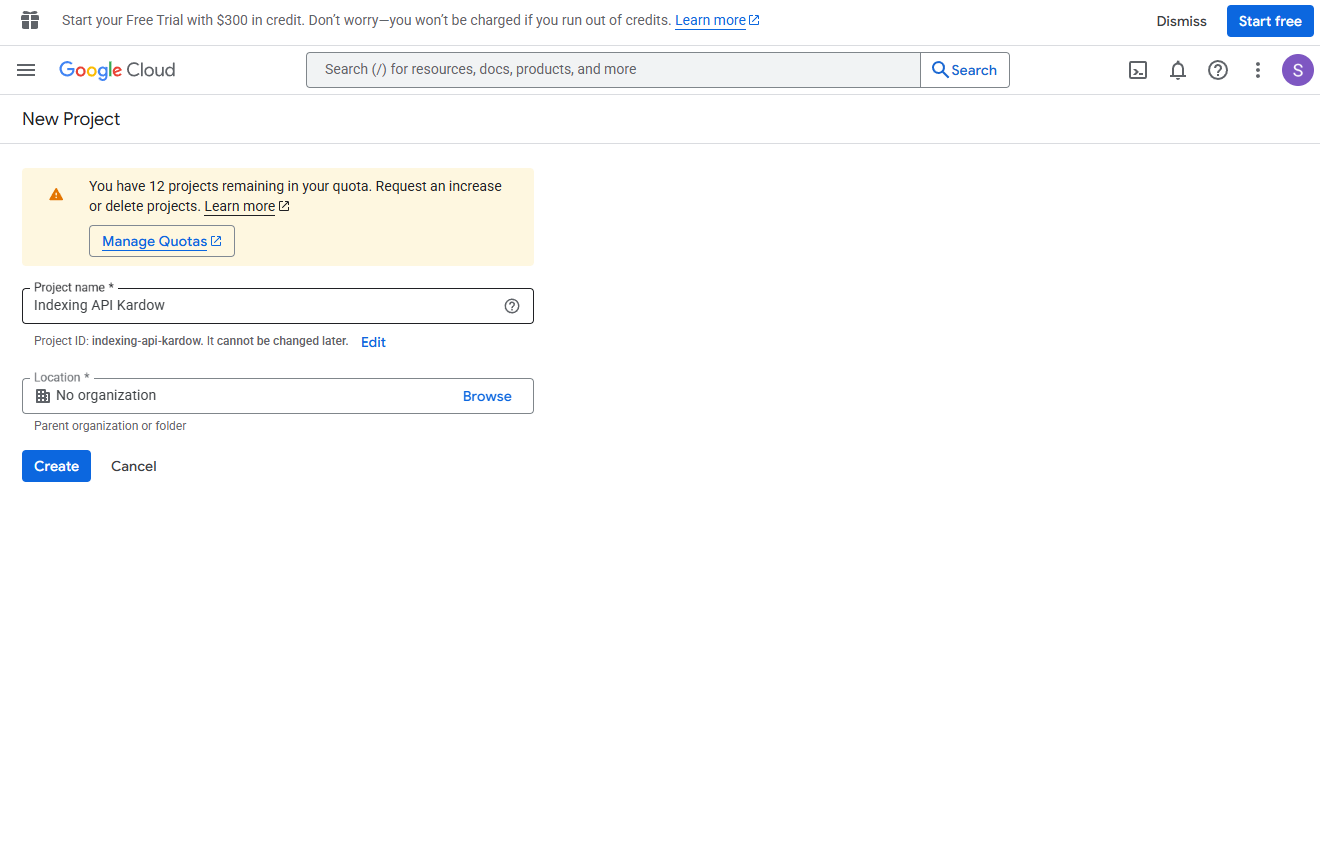
- Once created, click Select project.
- In the search bar, type Indexing API and select Web Search Indexing API.\
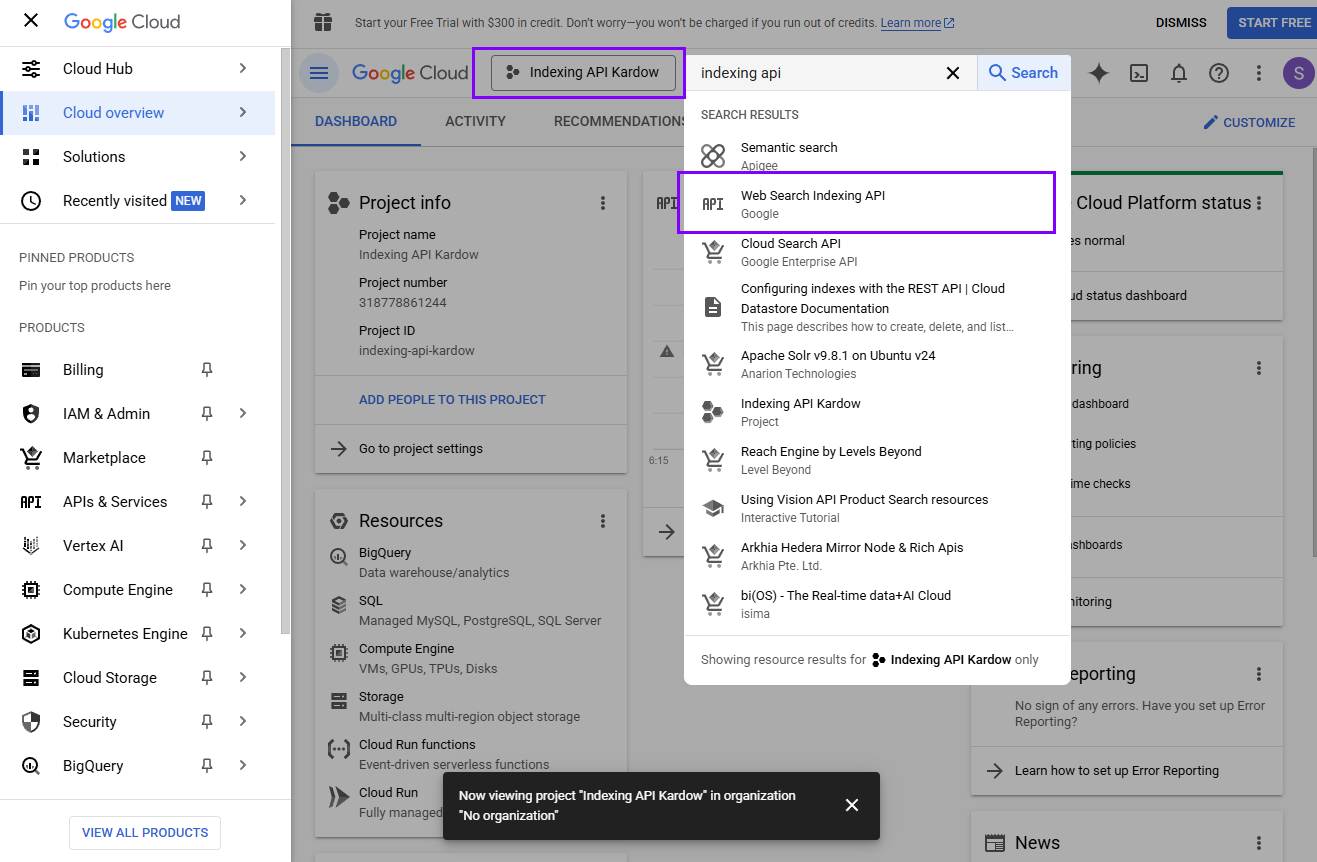
- Click Enable to activate the API.\
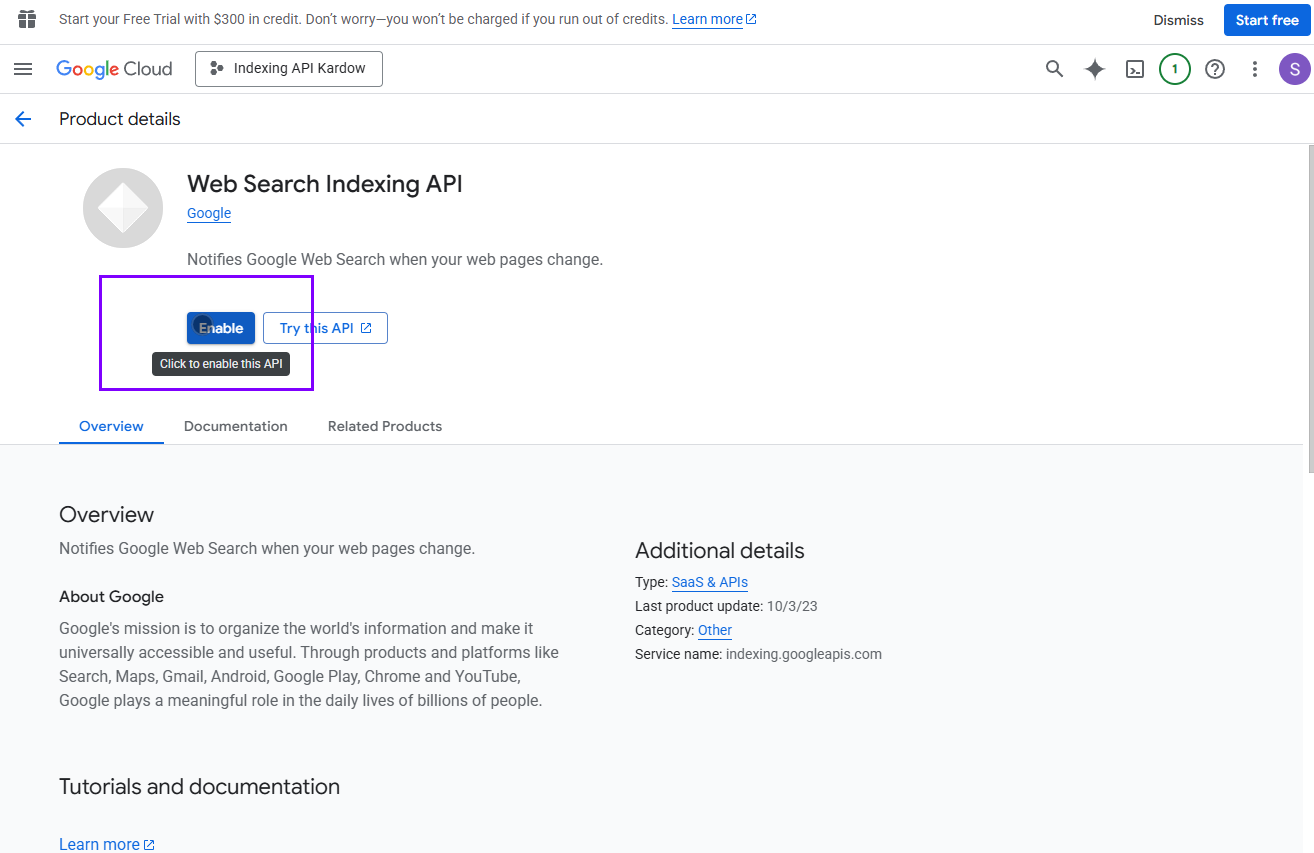
- When enabled, go to APIs & Services → Credentials.
Step 2: Create a service account
-
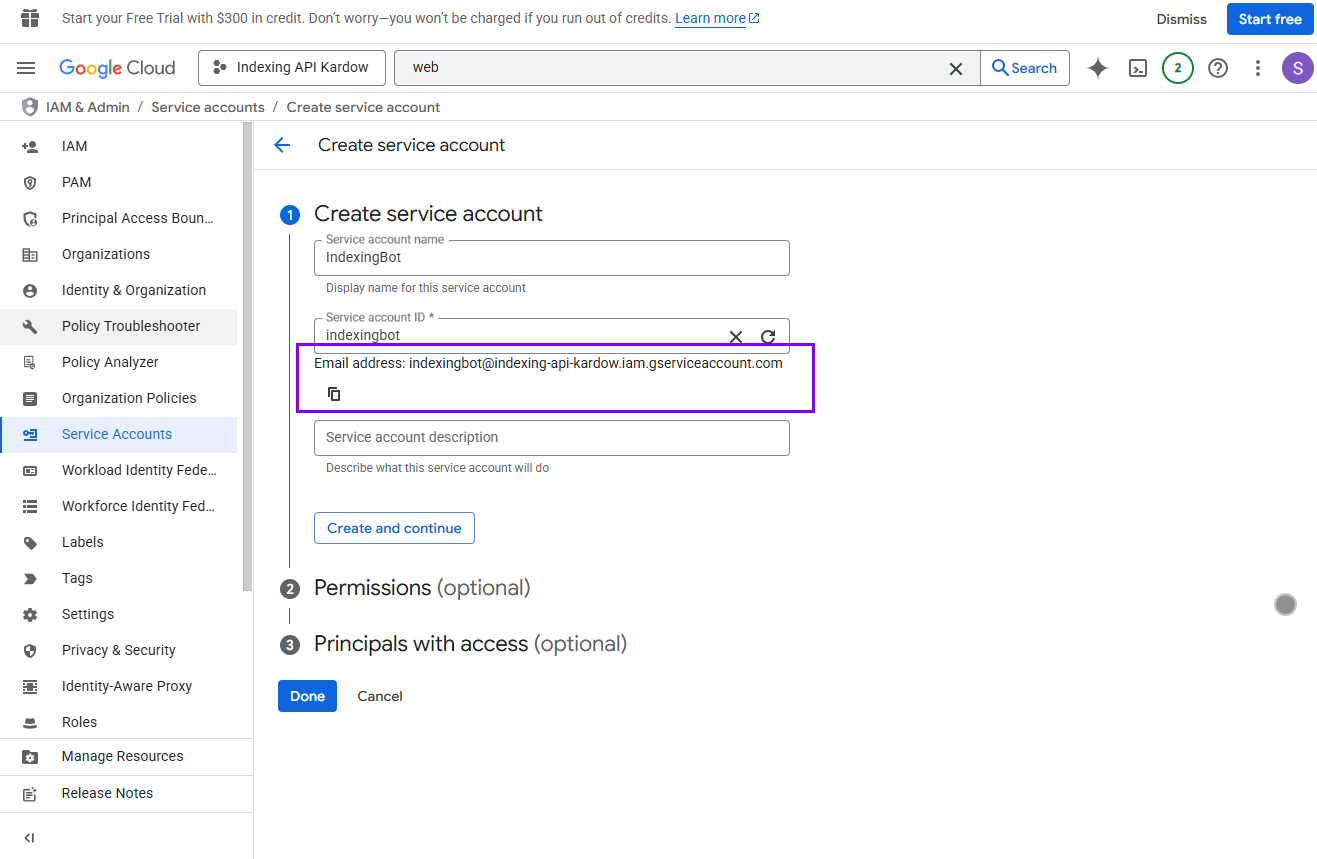
Click + CREATE SERVICE ACCOUNT.\

-
Name it something like
IndexingBot. -
Copy the Service account email — you’ll need it later (for example:
indexingbot@indexing-api-kardow.iam.gserviceaccount.com). -
Skip permissions and click Done.\
- In the list, click your new service account → open the Keys tab.
-
Click Add Key → Create new key → JSON.\
 **If this fails ** : (You might see this error message if this is a new account) - follow these steps below to fix this fast.
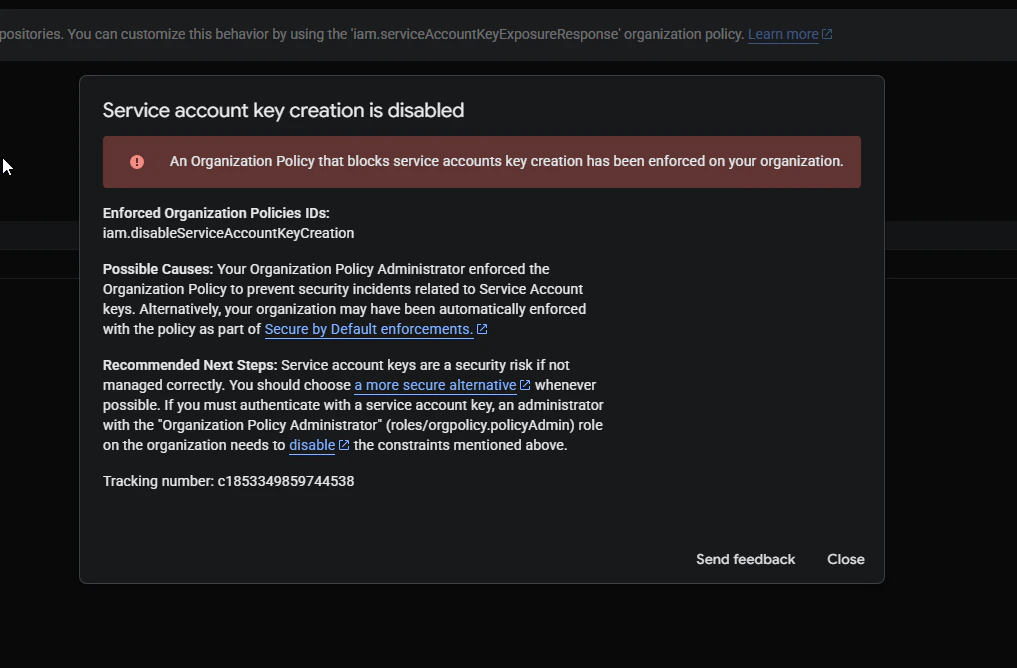
-
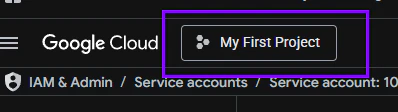
You need to click to select the project/organization at the top left
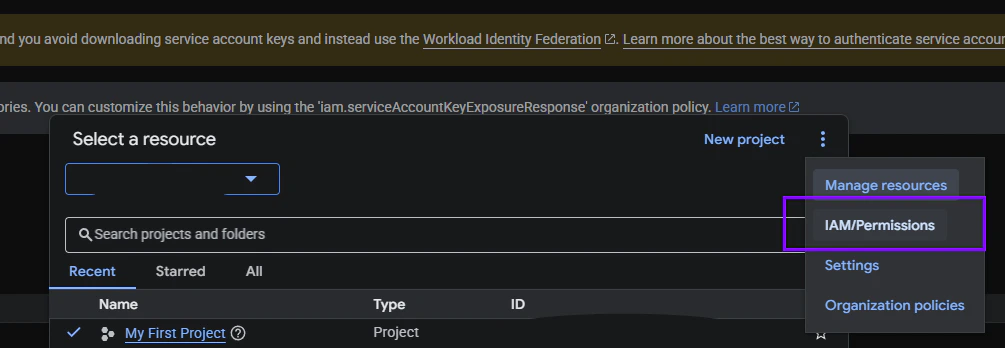
5- Edit your user and add Roles: “Organization Policy Administrator” and “Organization Administrator”. (Note that Organization Policy Administrator should be visible at this level, if you are at the project level, this policy won’t be available in the list).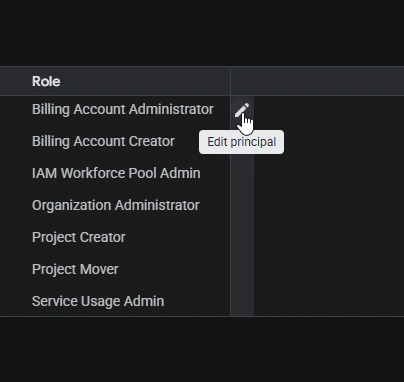
6- Now with those 2 roles, click on “Organization Policies” under IAM & Admin or repeat points 2/3 above and then select “Organization Policies”.
7- Search for “Disable service account key creation” and you should be able to click on Edit Policy and change the rule. -
You need to click to select the project/organization at the top left
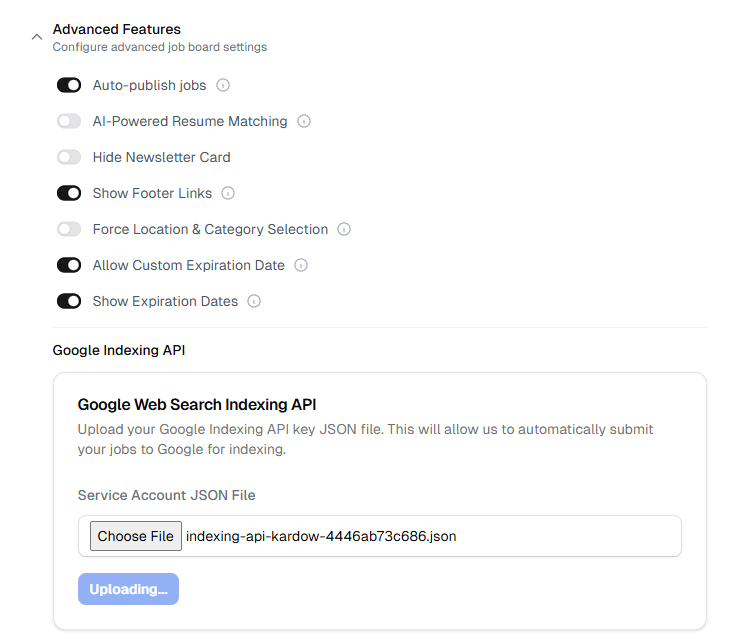
- Save the
.jsonfile that downloads automatically — this file is your authentication key. - Go to your Kardow dashboard → Settings → Advanced Features and upload the
.jsonfile exactly as it is.
Step 3: Verify site ownership in Google Search Console
- Go to Google Search Console.
-
Add your site (click Add property) and follow the instructions to verify it.
You can verify using an HTML file or DNS record. -
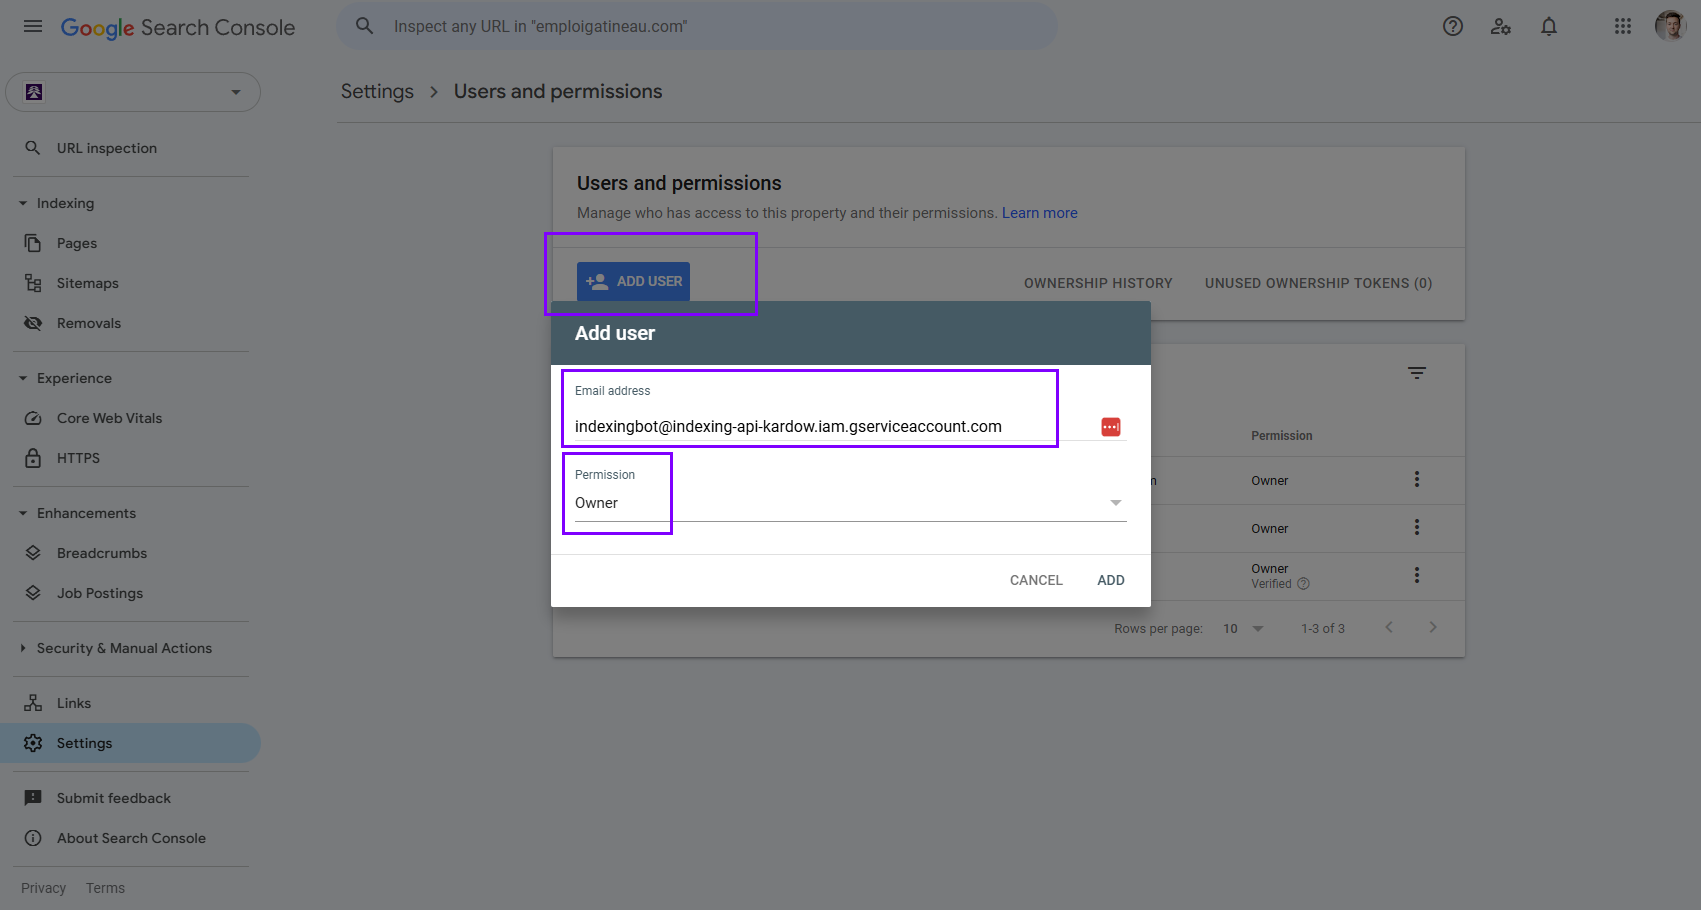
Once verified, open Settings → Users and permissions.\
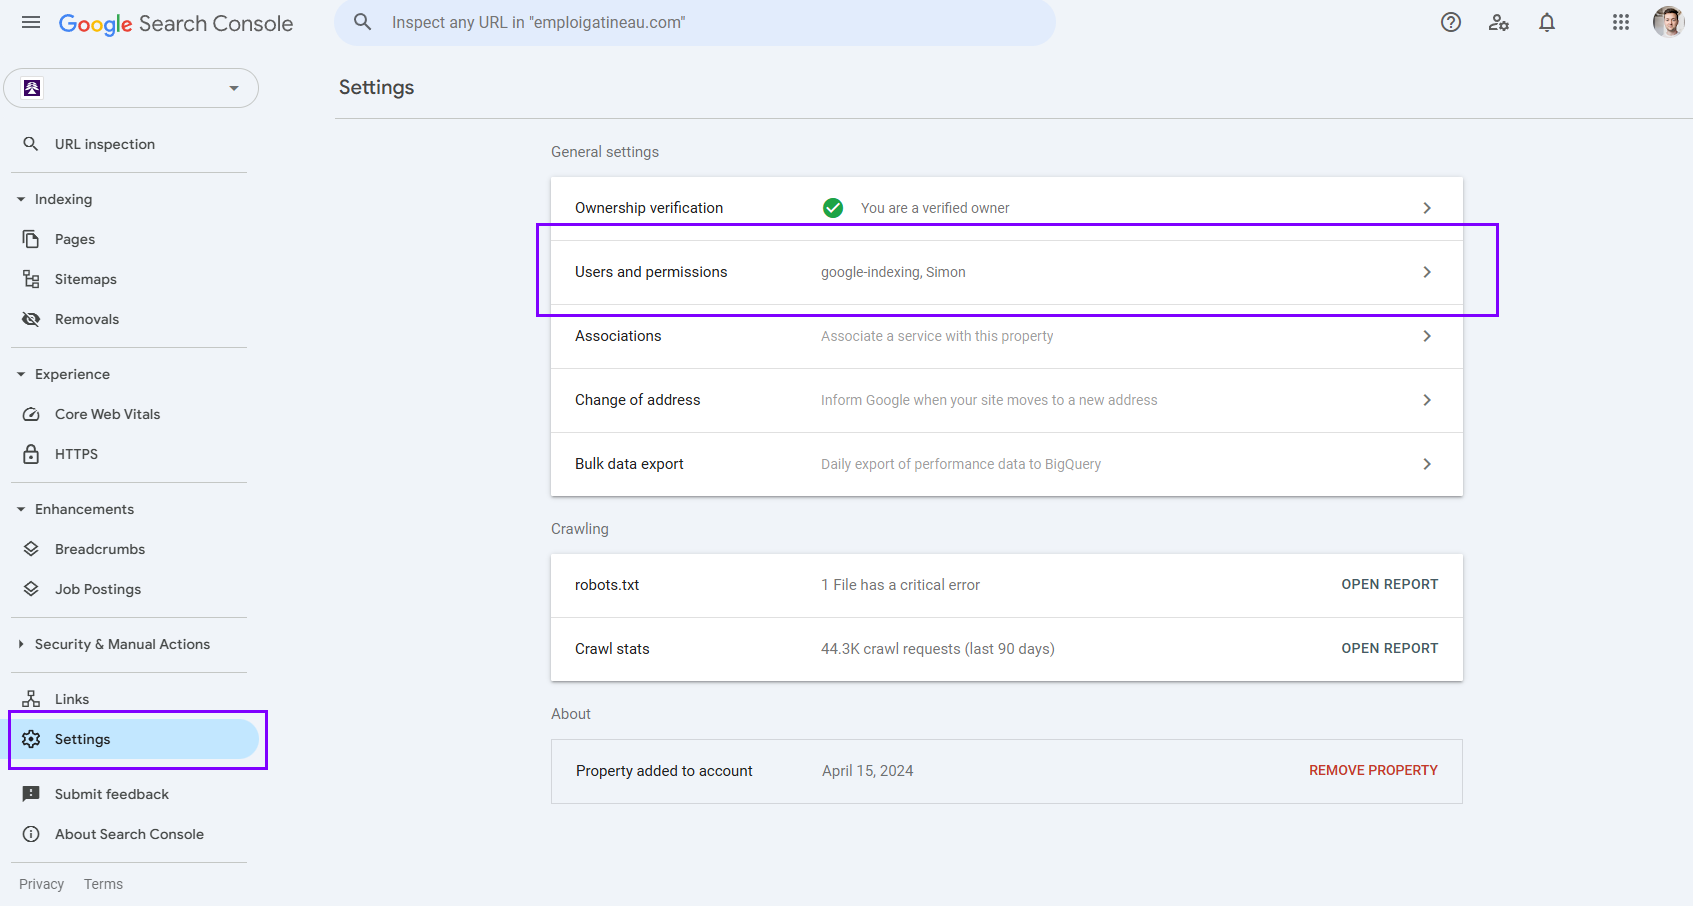
- Click Add user and paste the service account email you saved earlier.
-
Set the Permission to Owner.
The Indexing API requires Owner-level access to work properly.
Step 4: Verify and connect in Kardow
- Return to your Kardow dashboard.
- Make sure your service account file is uploaded.
- Kardow will automatically start using the Indexing API to submit your new job URLs to Google.
Result
✅ Once connected, Kardow will automatically notify Google when new jobs are posted.Most URLs will be indexed within 24 hours, instead of waiting weeks for normal crawling.
Notes
- Keep your
.jsonkey file safe — it contains sensitive credentials. - You can reuse the same service account for multiple sites if needed.
- If verification fails, double-check the service account email’s permissions in Search Console.